Friday, 23 October 2015

Eating Acorns

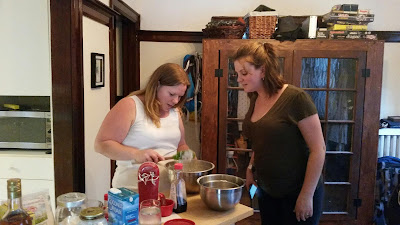
Oh man, the acorns workshop was awesome! And that bread? Holy moly. SO GOOD.

Courtney showed us the quickest and easiest way to make acorn flour, but there are a few different ways it can be done. 


The acorn nuts are quite bitter to begin with (I tried them to verify ;) so it's necessary to rinse them to get the tannins out.

(Cool fact: Tannins - from aging in oak barrels - give red wine a lot of their flavour!)

Before acorns are edible, the bitter tannins must be eliminated. For some oaks (English, chestnut oak) the tannins are minimal and peeling off the outer skin and lightly roasting the whole kernels will do. Most acorns need a water leaching to become edible. Boiling whole or lightly chopped kernels in several changes of water over several hours is one way. This makes a very dark nut with loss of sugar, and changed starch making it less useful for thickening. But the whole kernels can be eaten as is or added to granola or trail mix. Soaking whole or chopped kernels in fresh cold water is another way. This was traditionally done in a pit, or in a basket in a stream over several weeks. This washes out the tannins, leaving the sugars and starches and results in a pale nut which can be ground and used as flour or eaten as is. This cold processed flour is an excellent thickener, and makes good porridge.

The Fast Method:

The fast method results in a slightly poorer quality flour (less sugar and starch) than the boiling or cold water leaching process, but it’s super fast and easy. Having the modern convenience of wheat flour, corn or potato starch, and lots of sweeteners at hand the lack of the natural sugars and starches will not be missed when baking with acorn flour made this way!

Shell the acorns and discard any kernels that are discoloured. The nuts should be creamy white or pale beige. Cut off any black, grey, yellow or brown parts. 


Put 1 or 2 cups of kernels into a blender with lots of water. Blend to a fine paste, you want particles the size of cracked wheat or even cornmeal. The water will turn milky white, this is the starch coming out of the nuts. 


Pour the slurry into a clean nylon stocking. You want a fairly thick weave, not a sheer stocking. Let drain, and then wash the stocking full of nut meal under cold water, kneading the nut meal inside until the water runs clear and no more white starch comes out. The starch is easier to see than the tannin, so we use the absence of starch as a clue to when we have sufficiently washed the nuts.


Spread the nut meal out on a stocking or fabric covered dehydrator tray, or a fine mesh screen. Dry at a fairly high temperature for 6 to 10 hours, stirring and breaking up lumps occasionally. The oven can also be used, 15 – 20 minutes at 150 – 200F then leave the door ajar for several hours, stir, give it another 10 minutes at low heat until dry.

When completely dry, sift or run the meal through a food mill to even out the texture. Enjoy! 

When cooking with this acorn flour, use it in place of cornmeal in bread, cake or muffin recipes. It can also be used instead of almond or walnut meal. Use it with wheat flour for best texture, and add a spoonful of extra sugar and starch if you find the texture too heavy. This does not make good porridge, but is wonderful added to muffins and cookies.

References:
This is from the blog of an awesome Serbian guy. Lots of good info and crazy speculation. 

Acorn Bread Recipe


1 1/4 cup acorn meal
1 1/4 cup all-purpose flour
1 1/2 teaspoons baking powder
1/2 teaspoon baking soda
1 1/4 teaspoon salt
3 tablespoons maple syrup
1 egg
1 3/4 cup milk (I used coconut milk, any milk will do, homo or buttermilk make it extra rich)
1 tablespoon apple cider vinegar (omit if using buttermilk)
4 tablespoons butter or margarine (coconut oil ok)

preheat oven to 425 degrees F.

combine dry ingredients in large bowl, stir well. 

add wet ingredients except butter. stir into a smooth batter.

put butter into large skillet (12 inches or so) and put into oven to heat up. butter should melt and be very hot, just below smoke point.


pour batter into the hot butter filled skillet and put into oven.


reduce temperature to 375F or 400F.

bake for 30 minutes, until bread sets in centre and pulls away from the side of the pan.


serve warm!

Tuesday, 20 October 2015

Upcoming Workshop: D&D for Beginners

This Friday, October 23rd at 6:30 pm, we're holding our first D&D workshop! 


Do you like playing video games and watching TV shows like Game of Thrones? With D&D you and your friends can play as the heroes in your own story and world.


This session is meant to be an introduction to the 5th edition of D&D, which is the latest version and has been streamlined from previous editions and actually quite simple to pick up and play.

For this session I will not be focusing on character creations, instead I will be focusing on actual play. I will allow people to bring custom characters if they feel like reading the quick start rules and using a character sheet.


Quick start rules: http://media.wizards.com/2014/downloads/dnd/playerdndbasicrules_v0.2.pdf


My favorite character sheet (requires excel): http://www.enworld.org/forum/rpgdownloads.php?s=b46f26157d09df512d3df71f42415b06&do=download&downloadid=1234


If you don’t have time this week to do so, that is perfectly fine! I will be printing out standard character sheets this week before the session. You’ll still be able to give them their own personality, the limit is only your imagination.


RSVP on our Facebook page, or email harmonyhomeslice@gmail.com

Thursday, 15 October 2015

Making Clouds

I did a really cool craft project recently. I made clouds! 


I saw this idea online a year or two ago (the post can be found here), but just finally got around to trying it myself. I hadn't paper mached since elementary school, so there was a bit of a learning curve... and the post that inspired me was (IMO) a little sketchy on the details, so I'm including my advice for this project. I made two clouds, and learned from the first one. 

- Put down a tarp. I literally covered our studio in tarp and I'm so glad I did. This was messy. Wear clothes you're okay with getting paste all over. 

- I don't think the colour of the balloons really matters. They say to use white, but you're not going to see them anyways.

- For the paper mache paste, I just used flour and water, and made it slightly thinner than pancake mix. 

- I started out making my newspaper bits too small. I found about 4" x 8" to be about the ideal size, and ripped smaller bits when needed. In the end I realized I was spending too much time trying to make it look pretty, when it's not even visible in the finished product.

- I only put paste on one side of the newspaper, and less paste than you'd think. I ended up just slopping it on with my hands, though you could use a wide brush if you wanted. I used too much paste on the first one and it just took WAY longer to dry.

- It seems like two layers of paper mache is ideal. You don't want your clouds to come out too heavy, but you also don't want them to collapse. I waited about 4 hours between coats of paper mache, then about 16 hours until I started adding fluff. 

- I used two different types of paper (the first, Canadian Tire ads, the second, The National Post) to cover my balloons. It made it easy to tell where I'd already covered on the second pass. 

- They say to use spray glue, and although I think you could get away without it, I'd seriously recommend it. I think it went way faster this way, and the stuff dries fairly quickly so you don't have to hold it in place for long. It also makes it easier to fill in gaps - just spray the gap, and stick fluff on, without having to clear a space to affix it directly to the paper mache. 

In all, I'm so pleased with how they turned out - it was more time consuming and sitting on the floor than I anticipated, but totally worth it in the end. I'm slightly concerned that they're going to be magnets for dust and allergens, however. We'll see. Maybe I'll vacuum them?  

Saturday, 3 October 2015

Upcoming Workshop - How to Eat Acorns

Hello Friends!! 

I am very excited to announce that in October, Courtney will be hosting a workshop on how to eat acorns! 

Details of the workshop will be announced shortly, but in the meantime, it's acorn-gathering season! Here's a note from Courtney with some acorn gathering tips! 

find your oak trees. there are only a few oaks common in toronto, and all oaks produce potentially edible acorns. the different species of oak vary in size of acorn, and in levels of tannins in the nuts. the tannins are the bitter compounds that mean you can't just crack an acorn open and eat it like you can a walnut. we'll talk about how to remove the tannins on the day, but basically you wash them out of the nuts with water in various ways. there are kinds of acorns that you can eat straight off the tree but they aren't growing around here anywhere.
we can divide the local oaks into two broad categories, oaks with rounded leaves and oaks with pointy leaves. round leaf oaks are english oak, burr oak, and white oak. these have the sweetest acorns. they have acorns that have small hats and long nuts. english oaks often have very skinny almost columnar appearance, and are planted next to houses and buildings. some can be found on u of t campus, one is at the corner of harbord and spadina in front of the athletic centre. they have small rounded leaves. white oaks are big trees, sprawling in shape and they have larger leaves. burr oak have been planted in toronto by the city in the last 10 years, many are not large enough to produce many acorns yet. they have very big mitteny leaves, corky bark and gnarly twigs, and acorns with bristly hats. acorns from round leaf oaks will be very hard to find, because they are so delicious. squirrels, bluejays, raccoons and other wildlife will probably eat them all before you get there. 
the pointy leaf oaks you'll have more luck with. the black, red, and pin oaks all have pointy leaves, and big sprawing shapes, with crooked branches. pin oaks make extremely tiny acorns, so they are not worth harvesting. black and red oaks make very large acorns, round with big hats. these are less popular with the animals until frost and fall rainstorms have washed them and made them sweeter. go for these! they are often in parks north of davenport in the west end of the city. 

gather acorns:
ideally, you want acorns that have just fallen to the ground, with brown shells and no hats, or very loose hats. these are the ripest and best. gather acorns from the ground by raking, or put down a tarp and wait a couple days. i like gathering from areas where you know there won't be weeks old acorns (acorns on ground get infested with ants, worms and fungus) driveways, decks, and well maintained lawns are ideal. choose acorns with no visible holes, and discard acorns with bites out of them, cracked shells, or attached hats. wash and air-dry, and save them in a cool dry place until october 19!
email me with any questions. courtneyjanetlake@gmail.com

Top left - Pin Oak with tiny acorns!

Right - Black and Red Oak 


Bottom - English Oak


Tuesday, 1 September 2015

Upcoming Events - Clothing Swap and Art Jam - Part 2 - The Jam

The second act in our busy Sunday, September 13th is the Art Jam!


The Art Jam will get started at 6 pm after the Clothing Swap. 

This is an open invitation to visual artists of all specialities and skill levels. Whether you are a professional artist, or amateur, this workshop will give you the opportunity to expand upon the artistic tools in your toolbox and collaborate with creative minds! 

This will be an opportunity to network, as well as a space to share and receive advice, and explore different artistic mediums. 

Examples:

- Bring a piece you would like input on from other artists.
- Bring your business cards to exchange with others. 
- Bring ideas that you would like collaboration on. 
- Ask us about doing your own workshop to share your expertise, ie: Acrylic Painting 101

Additionally, we would love to curate a page on the site with links to your personal and professional websites (ie: blogs, instagram accounts, etc.) so that members can get in touch with you. Please feel free to bring this information with you to the Jam, or to forward it on Facebook or to harmonyhomeslice@gmail.com. 

We can't wait to see you :) Don't forget to bring your own materials.


Sunday, 30 August 2015

Garlic Confit Recipe

‘Confit’ is a preservation method that dates back thousands of years. But just because it’s old, doesn’t mean it has to be boring! This all-natural, slightly nutty, sweet *VEGAN + GLUTEN FREE* product can be used for many different dishes, including Garlic Bread, Marinades, Dressings, Sauces,Soups and Roasts.

Once you’re comfortable with garlic, experiment with fruit, cherry tomatoes, chilis, onions or even poultry and meat!

Expiration: Garlic confit can keep for months or even years.

Recipe:
4 heads of garlic Olive Oil to cover Kosher salt Fresh pepper Herbs, preferably fresh Hot chili flakes (to taste) Equipment needed: Sharp knife Cutting board 2 large bowls (optional) Sauce pot and lid Silicon spatula

Method:

Remove cloves of garlic from bulbs. Skin by hand (alternatively: place garlic cloves in one bowl, cover with the other bowl to form a globe and shake vigorously for 30 seconds. Uncover and remove the peeled cloves). Remove stem ends, green sprouts and any damage. Chop garlic into medium pieces (larger is better than smaller, use your judgment) and place in pot. Once all garlic is in the pot, add oil and cover all garlic by an inch. Season with salt, pepper and  herbs of your choice (I suggest rosemary, sage, thyme and basil).


By stove: place pot on stove over medium low heat. You want to ensure it is not boiling at any time.

By oven: preheat to 250 C, or 225 if your oven tends to have hot spots. Check occasionally.

After 45-60 minutes, check the garlic again. It should be translucent, slightly darker in colour and very fragrant. Stir to ensure consistency throughout the batch. You can’t over cook this at low temps, so it’s ok to carry on if it’s not 100 percent cooked.


Like it? Try these!


In oil:
Duck, Goose and meat
Onions
Leek
Chive
Scallion
Shallots

In simple syrup:
Pears
Apples
Raisins
Cherries

Garlic Confit Workshop

How did I not know about confit before? 


This stuff is pretty close to actual magic, I'm pretty sure! It was so easy to make, and we honestly spent most of the time sipping wine and chatting! 

The hardest part was getting the oil not to boil. It turns out my burners are just set so high that even on the lowest setting we weren't able to stop the mixture from boiling, so we ended up putting in in the oven on a very low setting, which worked perfectly. 

We used sage, thyme, rosemary, salt and pepper to season the batch, and it turned out beautifully. One point I would share is that you need way more of the spices than you might think. 


The finished product turned out a lot like roasted garlic, in flavour, although nuttier. I'm also very pleased to have ended up with a mason jar full of the extra garlic-infused olive oil, which will be making many appearances in salad dressings and bread dips in the future! 

Upcoming Events - Clothing Swap and Art Jam - Part 1 - The Swap

Sunday, September 13th is going to be a busy day at The Workshop Club Headquarters! 

Starting at 2 pm, we're hosting a clothing swap. 


If you've never been to a clothing swap before, you're in for a treat! Here's how it works: 

- Everyone brings over their old clothes. As much or as little as they have. These are nice, wearable things that you'd otherwise be donating to a thrift store. All sizes and shapes are welcome! You can also bring shoes, jewellery, accessories, etc. 

- We roughly organize everything into piles - pants, tops, dresses, etc. 

- Free for all! Everyone gets to look through the clothes and take anything they want. We'll have a mirror/room for trying things on, and snacks out. Feel free to bring refreshments or snacks to contribute, but no pressure. If more than one person is interested in an item, they can negotiate among themselves. 

- Remember, this can be a great way to pick up materials for crafting, sewing, etc. If you see something that speaks to you but doesn't fit, there's nothing wrong with grabbing it and crafting it into something that works for you! We're going to have lots of crafty workshops coming up, so think ahead! 

- Once everyone has had a chance to take what they want for free, any remaining items are left behind. The host will pack them all up and donate in bulk to an organization that impacts our community. In the past we've donated to organizations like Goodwill, the Salvation Army, local women's shelters, youth shelters, etc. This time the items will be donated to a community member organizing a fundraiser for MS. 

*If you have a cause you'd like to see items donated to next time, let us know - we're always looking for ways to give back to our community and beyond!*

Friday, 21 August 2015

Our Gluten-Free Baking Workshop

We had so much fun last night at the baking workshop! 

The cupcakes were totally divine, and I learned a ton about baking. I consider myself a reasonably accomplished baker, but I really don't hold a candle to Holly's skills. 

I am really excited to apply the tips Holly gave us, and I think they'll be helpful even with my glutenous baking. For example, I had no idea that the temperature of ingredients made such a difference in the outcome of the recipe, but I honestly think they were the best cupcakes I've ever had, which speaks for itself. 

When testing his cupcake, Andrew used many creative swear words, and declared them "Even better than 'normal' cupcakes!" 

I'd say that's a win. 

Thanks so much Holly :D 

Gluten Free Baking With Holly - Coconut Cupcakes Recipe

Holly D's Gluten Free Vegan Toasted Coconut Cupcakes Ingredients: - 2 servings of egg replacer (2 tsp mix plus 2 tbsp water) - 1/2 cup vegan margarine (refrigerated) - 3/4 cup white sugar - 3/4 cup coconut milk - 1/2 tsp vanilla extract - 1 tsp coconut extract - 2 tsp rum - 3/4 cup white rice flour - 1/3 cup potato starch - 1/3 cup tapioca starch - 3/4 tsp xanthan gum - 3/4 tsp baking powder - 3/4 tsp baking soda - 1/2 cup sweetened coconut, toasted - pinch of salt Directions: 1. Preheat oven to 350 degrees and line a muffin pan with liners. Toast the coconut by cooking it in a frying pan on medium heat, stirring frequently for approximately 3 minutes or until browned. Set aside. 2. In a small bowl mix the egg replacer and water together until smooth, set aside. 3. In a bowl sift together the rice flour, potato starch and tapioca starch; stir in the xanthan gum, baking powder, baking soda and salt. Set aside. 4. In a large bowl cream the margarine and sugar together using an electric mixer until it becomes pale and fluffy. Add the vanilla and coconut extract, and the rum and mix until combined. Add the "eggs". 5. Add approximately 1/3 of the coconut milk to the butter mixture and blend until thoroughly combined. Then add approximately 1/3 of the "dry" flour mixture to it and again blend until combined. Repeat until all of the coconut milk and dry ingredients have been added. 6. Gently fold in the toasted coconut. 7. Using an ice cream scoop, evenly distribute the batter into the muffin pan to create 12 cupcakes. 8. Bake for 20 minutes or until the tops are just becoming golden. Insert a toothpick to ensure that the cupcake is thoroughly cooked. Allow to cool before icing. "Buttercream" icing Ingredients: - 3/4 cup vegan margarine (refrigerated) - 3 cups icing sugar - 1 tsp vanilla extract Directions: Cream together the margarine, vanilla and 1 cup of icing sugar until smooth. Add 1 additional cup of icing sugar and blend again until smooth, and repeat one last time. Decorate!


Monday, 17 August 2015

Upcoming Workshop - Garlic Confit with Brie

On Sunday August 30th at 3 pm, The Workshop Club will be hosting a Garlic Confit workshop at our Headquarters! 

Our facilitator, Brie, will be teaching everyone how to make a tasty confit, and providing the ingredients for everyone to make their own confit at home. Confit is all natural, vegan and gluten free! 

A $10 donation is suggested for this workshop to help pay for materials. Please note donations are NOT mandatory, and everyone is welcome.

We will ask participants to bring a chef's knife, cutting board, and a sanitized 1 cup container, for taking home ingredients. Everything else will be provided. 

Please RSVP on our Facebook page. PM Harmony Page if you need an invite to the group! 

Upcoming Workshop - Gluten Free Baking with Holly

Coming up this Thursday August 20th at 6 pm, The Workshop Club is hosting our first baking workshop! The workshop will be held at our Headquarters, near Jane St and Annette St in Toronto.

The lovely and talented Holly of Gluten Free Holly D (find her blog here) will be at The Workshop Club Headquarters teaching us to bake gluten free coconut cupcakes. Holly is a talented self-taught gluten free baker, who creates her own recipes. The recipe we are making is also vegan!

We are requesting a $2-$5 donation for this workshop, to help cover the cost of materials. Please note donations are NOT mandatory, and everyone is welcome. 

Please RSVP on our Facebook page. PM Harmony Page if you need an invite to the group! 

Upcoming Workshop - Sewing Level 1

This is going to be the first in a series of sewing workshops. 

I am an accomplished seamstress, and I have been sewing since before I can remember. My mom taught me to use a sewing machine when I was a small child, and though i have no formal training, I have about 25 years of trial and error and self-guided experience. I have made everything from simple drawstring bags, to prom dresses to hoodies and jeans. My style tends to be unique and unpolished, and I tend towards making my own patterns as opposed to following others'. That being said, I do know how to follow patterns, and can provide guidance on creating more tailored looks. 

This first workshop will be the very basics of sewing with a machine. You will learn:
- how to thread a standard sewing machine
- different common settings and stitches, and what they are useful for
- how to pin and hem
- everyone will get an opportunity to use a machine 

As well, I'd love to see pictures or hear ideas of projects people would like to work up to. This will allow me to create a program to guide you in your sewing journey! 

This workshop is tentatively scheduled for September 20th at 2 pm. If there is sufficient interest, we will schedule a second Level 1 workshop. 

Please RSVP on our Facebook page. PM Harmony Page if you need an invite to the group!